Photos By Meta
Moment Pro Camera App User Guide Manual

Follow Meta On YouTube
Follow Scott On YouTube
Follow Us On Instagram
Follow Us On Flickr
Purchase Meta’s Nature Photography

#Ad • Find The Best Apple iPhone Video Apps
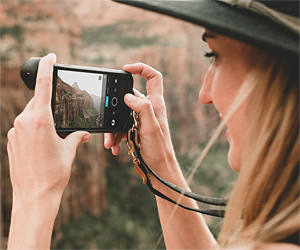
How To Use Moment Pro Camera App For iPhone Photography and Videography
Moment Pro Camera App User Guide Manual
Version 5.6.3
Moment Pro Camera App
Moment Pro Camera App is a popular Photography App for the Apple iPhone used by many Professional Photographers and Videographers.In this Moment Pro Camera App User Guide Manual, you’ll Learn How To Use Moment Pro Camera App for Apple iPhone Photography and Videography.
When using Moment Lenses, we highly recommend setting up one preset for each Moment Lens.
Moment says they are hard at work building the future of PRO Camera.
Moment Pro Camera App Premium Features
• Timelapse Mode – Capture stunning time-lapse videos.• Slow Shutter Mode – Long exposure shots with motion blur and light trails.
• Supports new Moment T-Series iPhone Lenses.
Moment Pro Camera App Professional Features
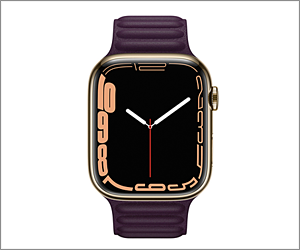
• Apple Watch Integration – Remotely Frame your shot and take photos using Moment Pro Camera App for Apple Watch.• Anamorphic Lenses – De-Squeezing for Anamorphic Lenses, 1.33x and 1.55x.
• Focus Peaking – Yellow Focus Edge glow will help you find dial in the focus.
• Zebra Stripes – Stripes onto the over and underexposed areas in the viewfinder.
• Color Profiles – Select from Default, Flat, or Log Color Profiles.
• Video Bitrates – Control over Video Quality with Standard, Medium and High Bitrates.
• RGB Histogram – Live RGB Histogram.
• Waveform Monitor – Evaluate video brightness and exposure across your image in real time.
• Audio Meters – Correct Sound Levels with real-time, precise Dual Channel Audio levels.
• Live Histogram – Get your Exposure right every time.
• Video Stabilization – Make your Hand Held Videos Smoother.
• Precise Video – Change your resolution and frame rate on screen.
• Limited Gimbal Integration.
Other Features
• Triple / Dual Lens Control – Manually control which side of the triple / dual lens you want to shoot with.• Moment T-Series Lens Support – Select which Moment T-Series Lens you are shooting with.
• Moment Battery Case – DSLR Like Shutter Button on Moment iPhone Cases for half-press and full-press capture.
• Apple Watch App – Use your Apple Watch as a Remote to Shoot Photos or Record Videos.
• Siri Shortcuts – Quick access to capture a photo or start a video.
Moment Pro Camera App Settings
Our Recommended Moment Pro Camera App Settings
Here are our Recommended Settings for Moment Pro Camera App.
General Settings
Location –> Off
Grid –> Golden Ratio
OSMO Mobile –> Set to Focus if you use an OSMO 3, 4 or 5 Gimbal.
App Icon –> Pick your Favorite App Icon.
Volume Button Shutter –> On (Required to use any ISO Remote Control).
Disable All Announcements –> On (Disables Notifications).
Exposure and Focus
Focus Peaking –> On (Helps with Manual Focus)
Histogram –> On (Helps with Manual Exposure)
Highlight Clipping –> Off
Shadow Clipping –> Off
Bracketing –> Off (Requires Post Processing)
Photo Settings
Standard Image Format –> JPG (Most Compatible)
Processed Photo Quality –> Quality (Uses HDR and Deep Fusion)
Video Settings
Standard Video Format –> H.264 (Most Compatible)
Stabilization –> On For Hand Held | Off For Gimbal
Frame Rates –> NTSC (North America)
Bit Rate –> High (100 Mbps)
RGB Histogram –> On
Waveform –> Off
General Settings
Location –> OffGrid –> Golden Ratio
OSMO Mobile –> Set to Focus if you use an OSMO 3, 4 or 5 Gimbal.
App Icon –> Pick your Favorite App Icon.
Volume Button Shutter –> On (Required to use any ISO Remote Control).
Disable All Announcements –> On (Disables Notifications).
Exposure and Focus
Focus Peaking –> On (Helps with Manual Focus)Histogram –> On (Helps with Manual Exposure)
Highlight Clipping –> Off
Shadow Clipping –> Off
Bracketing –> Off (Requires Post Processing)
Photo Settings
Standard Image Format –> JPG (Most Compatible)Processed Photo Quality –> Quality (Uses HDR and Deep Fusion)
Video Settings
Standard Video Format –> H.264 (Most Compatible)Stabilization –> On For Hand Held | Off For Gimbal
Frame Rates –> NTSC (North America)
Bit Rate –> High (100 Mbps)
RGB Histogram –> On
Waveform –> Off
Audio Settings
Audio Levels –> OnSample Rate –> 48 kHz
Bit Depth –> 24 Bit
Recording –> Stereo
Built-in Mic –> Back
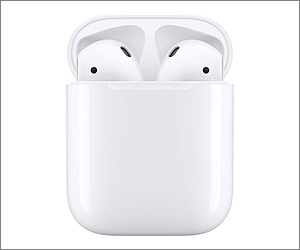
Bluetooth Mic –> On (When Using Apple AirPods)
Set Headphone Volume Level to 0 to Mute Your Apple AirPods.
Anamorphic Lens
Apply De-Squeeze to Saved File –> On (Anamorphic Lens).Video Settings – Top Row
Flash –> OffColor Profile –> Flat
Resolution –> 4K
FPS –> 30 FPS (For YouTube Videos)
Lens –> None (Select A if using an Anamorphic Lens)
Video Settings – Bottom Row
Shutter Speed –> 1/60 (30 FPS) – FixedISO –> Use The Lowest Possible Setting For The Lowest Noise. Always Keep ISO Below ISO 100.
EV –> 0.0.
Auto Focus –> On (Manual if using Focus Peaking)
White Balance –> AWB or Use White Balance Card
Video Presets
The preset controls allow you to configure, save and update presets for most of Moment Pro Camera App’s settings. This allows for quick recall of a particular shooting style. Select the desired frame rate and then Save as a Preset. We recommend setting up one Video Preset for each Apple iPhone Pro Camera and for each Moment Lens.Company Reference
Moment Pro Camera App User GuideHow To Use Moment Pro Camera App With Zhiyun Smooth 5S Gimbal
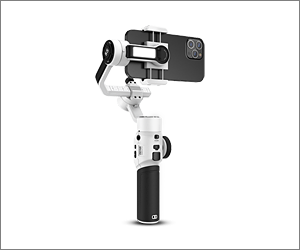
Zhiyun Smooth 5S Gimbal Button Layout
Moment Pro Camera App does not Fully Integrate with the Zhiyun Smooth 5S Gimbal (Focus Wheel Does Not Control Focus). In this Moment Pro Camera App User Guide Manual, you’ll Learn How To Use Moment Pro Camera App with the Zhiyun Smooth 5S Gimbal’s Controls and Modes:
Zhiyun Smooth 5S Gimbal Button Layout
Power Button – Press and Hold for 2 seconds to Power On | Off.
Single Press Power Button when powered on to Check Battery Level.
Flashing Red PF light indicates Low Battery.
Center Thumbwheel – Controls Light Intensity when Attached and Light(s) Turned On.
Red Record Button – Stops | Starts Recording or Takes a Still Photo. (Volume Button Shutter Needs to be Enabled).
Rear Trigger Button – Press and Hold to Enter Go Mode.
Press 2X to Reset Orientation.
Press 3X to Flip Phone 180° (Selfie Mode).
Joy Stick – Pan Up | Pan Down and Pan Left | Pan Right. This is pressure sensitive allowing for precise control.
FN Button – Press 5X to Reset Bluetooth (If Switching Apple iPhones).
Mode Button – Single Press Mode Button –> Switch Gimbal Follow Modes (PF – L – F – POV – V)
See Our Zhiyun Smooth 5S Gimbal User Guide For Mode Button Descriptions.
Top LED Panel – Tells you which Gimbal Follow Mode the Gimbal is in.
2X Press Mode Button –> Returns to Previous Follow Mode
Zhiyun Smooth 5S Gimbal Button Layout
Power Button – Press and Hold for 2 seconds to Power On | Off.Single Press Power Button when powered on to Check Battery Level.
Flashing Red PF light indicates Low Battery.
Center Thumbwheel – Controls Light Intensity when Attached and Light(s) Turned On.
Red Record Button – Stops | Starts Recording or Takes a Still Photo. (Volume Button Shutter Needs to be Enabled).
Rear Trigger Button – Press and Hold to Enter Go Mode.
Press 2X to Reset Orientation.
Press 3X to Flip Phone 180° (Selfie Mode).
Joy Stick – Pan Up | Pan Down and Pan Left | Pan Right. This is pressure sensitive allowing for precise control.
FN Button – Press 5X to Reset Bluetooth (If Switching Apple iPhones).
Mode Button – Single Press Mode Button –> Switch Gimbal Follow Modes (PF – L – F – POV – V)
See Our Zhiyun Smooth 5S Gimbal User Guide For Mode Button Descriptions.
Top LED Panel – Tells you which Gimbal Follow Mode the Gimbal is in.
2X Press Mode Button –> Returns to Previous Follow Mode
How To Use The Timelapse Mode
How To Use Timelapse Mode In Moment Pro Camera App
Timelapse Settings – Top Row
Flash –> OffPhoto Format –> TIFF (Better Quality)
Resolution –> Max
Lens –> None (Select A if using a Moment Anamorphic Lens)
Frames –> Select Number of Frames – Watch Capture and Output Times
Video Settings – Bottom Row
Timelapse Effect –> Select Motion Blur or Light TrailsShutter Speed –> 1/10th Adds Smooth Motion Blur
ISO –> Use The Lowest Possible Setting For The Lowest Noise. Always Keep ISO Below ISO 100.
EV –> 0.0.
Auto Focus –> On (Manual if using Focus Peaking)
White Balance –> AWB or Use White Balance Card
Apple Watch Integration
#Ad • Apple Watch – When paired with Moment Pro Camera App on your Apple iPhone, Apple Watch allows the wearer to remotely call Moment Pro Camera App’s start and stop functionality as well as preview.
How To Rename Files On Your Apple iPhone
Apple iPhone Files App
How To Rename Files On Your Apple iPhone
Here’s How To Rename Photos on your Apple iPhone.1. Open the Apple iPhone Files App.
2) Select the File you want to Rename.
3) Long Press on the File.
4) Select Rename and Type in the New Name.
5) Press Done.
How To Save Your Files To SD Card
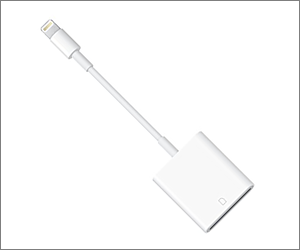
How To Save Your Files To SD Card Using USB-C Adapter
Here’s How To Save Photos to SD Card on your Apple iPhone This procedure can also be used to Backup Your Apple iPhone Photos to SD Card.1. Insert the SD Card into the Apple SD Card Reader and plug it into your Apple iPhone.
2. Open the Apple iPhone Files App.
3) Select the File(s) You Want to Save To the SD Card.
4) Select the SD Card at the Bottom.
5) Press Save. This may take a few minutes, depending on the SD Card Transfer Speed and the Number of Files.
How To Save Files To Your Mac
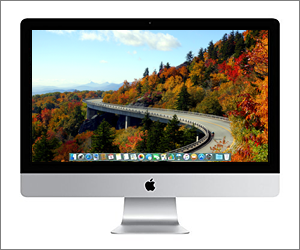
How To Save Your Files To Your Mac
1. Connect your Apple iPhone via USB-C to USB-C Cable to your Mac and Launch Image Capture.2. Select the Files you want to Save to your Computer. Click Save To... and select a directory on your Mac.
3. After File Transfer, you can Delete any Files from your Apple iPhone by Selecting and pressing the Delete Key.

Photos By Meta
Hickory, NC 28601Privacy Policy
©2024 Photos By Meta. All Rights Reserved. Top 10 Apple iPhone Photography Tips, Techniques and Gear Reviews For Photographers and Videographers.